Parent-Teacher Conferences

Tonight was parent-teacher conferences. Not a lot of parents came to my room, but there were enough to make a fairly steady flow of conversations. I am fortunate to have some really great kids as students, so I did not stress about what to say to the parents who came through. What I was unprepared for, though, was how many parents complimented me. Things they said, beyond "this is ___'s favorite class", were consistently complimentary toward me:  
- feels like you listen to him
- feels like you talk on his/her level
- says you take the time to explain things
- trusts you.
My head is feeling a bit swelled. ;)

Gold Stars: The Next Generation

Great job!
Fridge Worthy!
Once upon a time, a teacher put a gold star on the top of a student's schoolwork to let that student know that she had done a great job. The student brought her work home to show her mother, and her mother proudly posted the paper on the refrigerator with a magnet so that everyone who came into the kitchen could see the gold star.

Fast forward to the 21st century. No longer do students write on paper - they write on their electronic devices. They turn their work in electronically. The teacher grades their work electronically, too. There is no paper to stick a gold star to (and indeed, the stainless steel refrigerator cannot even support a magnet). How can the teacher communicate to the student that the child's work is exemplary? How does the student relay to the parent that she did really well? How does the parent let the child know that he is proud of her? With badges.

Remember your Boy Scout or Girl Scout badges? (In 4-H, we had pins.) These badges are the same thing. The student earns a badge after completing a series of activities and demonstrating knowledge in a particular area.  Only instead of having to sew them -or iron them- onto a uniform, they are posted on the student's digital portfolio.

Best of all, parents, you can tweet and facebook and instagram your pride to a much larger crowd of people than would fit in your kitchen. Now THAT is pinteresting.

Digital Credentials

"A digital badge is a validated indicator of accomplishment, skill, quality or interest that can be earned in many learning environments."  HASTAC
In my high school chemistry classroom, I have initiated my own series of badges that proclaim that a student has mastered a skill or achieved a science goal.  My badges are a work in progress, and while criteria for issuing them are still evolving, they are my version of the gold star for my high school chemistry students. The lab skills badge on the left, with its criteria listed below, is one example. This badge was created using Credly. I can add the badge to the student's digital science portfolio when he or she has achieved the criteria.

Another type of badge is the Civics Competency badge I put together from Canva; I am obviously not a graphics designer, but you get the idea how this site could be used. I like the idea of having an actual "badge" look, with a ribbon or star, more than a postcard look.


Another is OpenBadges. This product has a badge designer page that is straight-forward, but a bit clumsy and with limited scaling options. My first attempt yielded the Skilled Collaborator beast below. It seemed like the harder I tried, the uglier it got.

One of my goals this year is to create a whole set of badges that align with my curriculum objectives. This includes both the chemistry curriculum, overall science skills such as the lab skills and graphing, plus the stuff like citizenship and tech saavy skills.

Where and How to Make Badges

There are lots of ways you can make your own badges to give your students.  Basically, any tool that can create an infographic can create a badge.  I used CredlyCanva, and OpenBadges to experiment with, but you could use Paint or PhotoShop or any number of tools to design a badge for your students.  It is up to you to define what it is and how it will be used. Do you need ideas? A conference for educators called the Reform Symposium E-Conference had a variety of badges to distribute to conference attendees, and viewing them may give you some ideas. Or you can use pre-existing badges and criteria, such as those at MakeWav.es.

Why and How to Use Badges

Badges are akin to a certificate of accomplishment, in an electronic, pictorial form, and everyone loves to earn a certificate of accomplishment. I am using badges to show that a student has attained certain goals and has a reasonable understanding of the concepts for a unit. A criteria list is super helpful for answering the "badge or not to badge" question.

My students have a digital portfolio where they store lab reports, digital presentations, and the like. When a student achieves a particular content knowledge or other goal, I will post the badge on their portfolio. The student can then download it and share it on other media.  You can see the lab skills badge and criteria above, as examples. The Tech Savvy badge shown here is another example. As I said, I am still in the badge development stage, so I do not have a lot of my own to share.


More ideas?

  • Community Service
  • Science Team Participation
  • Class Facilitator
  • Aquarist (I have a fish tank in my classroom that requires cleaning and chemistry monitoring)


How Thick is Aluminum Foil?

Measurements, Significant Figures, and Density

The first unit in chemistry class includes measurements and general number sense. There are several labs that we do and review as a class to get the idea of significant figures.  One of these labs involves determining the thickness of aluminum foil. First the students had a warm-up as the bell-ringer:

Class Warm-up:  Density

 Remember the relationships:
 Density = mass/Volume and  Volume = length x width x height.

These two equations can be combined to yield:
                      m
D = -----------------------------
                l x w x h
If you wanted to know how “tall” something is, you would solve for h, as in the equation following:

                      m
 h = -----------------------------
                D x l  x w

Solve the following problems:1.       What is the volume of a block that is 8.20 cm long, 2.25 cm wide, and 1.00 cm high?
2.       If the density of a substance is 0.525 g/cm3, and the volume of a sample is 18.25 cm3, what is the mass of the sample?
3.       A piece of paper is known to have an area of 595.5 cm2 and a mass of 4.589 g. What is the thickness (height) of this paper, if paper has a density of 0.72 g/cm3?

Class Activity: Foiled

Pre-cut squares of three types of aluminum foil were set out, and students were directed to take the measurements needed to calculate the thickness, based on the warm-up calculation above. The density of aluminum was given to the students as 2.70 g/cm3. I tried to cut the squares so that they were not an exact centimeter size, so that students would need to read the mm lines and estimate a "between the lines" digit.
Foil squares origami envelope
Pre-cut squares of foil saves time.
I made quick origami envelopes to store them in. 


foldable origami envelope
Origami pocket directions


Physical versus Chemical: How do you know?

We are in the first two weeks of chemistry and everything is about "How science is done?": the maths, measurements, observations, evidence, data recording, you know the stuff.  One of the labs was a nine-station physical versus chemical lab. When they were finished with the experiments I had the students go back to tables that did not include their lab partners and consult with others on their conclusions. They shared observations and were directed to argue with each other on whether a particular station was a chemical change or physical change. I felt this piece of the work was important for students to understand that their analysis and conclusion must be defendable with evidence. We also used this time to talk about when scientists disagree. Last year I incorporated POGIL into my lessons. This year I am adding ideas about teaching and learning through argumentation; argumentation is really evidence-based reasoning in relation to scientific and social issues.

A couple of side notes:
  • A variety of waste disposal methods are asked for, depending on the station, which was good practice for the students. 
  • Nine stations may be too many for some classes. I found it perfect for many, but one too many for some.
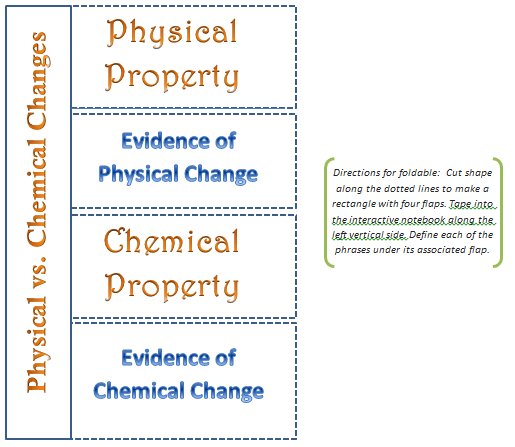
After the lab, the class shared results as a whole and came up with definitions for physical change, evidence of physical change, chemical change, and evidence of chemical change.  These definitions were added to the students' interactive notebooks in the form of the following foldable. 


Finally, for the assessment, students were asked to write a well-developed conclusion (at least 4 sentences) about what was learned and what types of observations (evidences) can be used to tell whether a physical or chemical change has occurred.

For those that are interested, the entire lab assignment follows.

Physical vs. Chemical Change Lab

Background Information

How can you describe a pile of gold scientifically? You talk about its physical and chemical properties.  Physical properties are characteristics that can be observed or measured without changing the makeup of the substance. Examples of physical properties are each phase of matter, color, density, weight, volume, texture, taste and smell. Chemical properties are characteristics that identify the chemical makeup; examples are elements from the periodic table.

What happens if I want to melt my pile of gold to make coins? This would result in a physical change.  These physical and chemical properties can change. Physical change defines when a substance has changed its “look”, but not its chemical substance. Examples of physical changes are melting, freezing, cutting, boiling or mending. A chemical change forms new substances; material goes through a chemical reaction. Examples of chemical reactions are rusting, creation of gases or bubbles, burning wood, cooking.

Pre-Lab:

Write a description of the differences between physical and chemical reactions. What are properties and changes? What are examples of physical properties, physical changes, chemical properties and chemical changes?

Procedure

Set up a data table in your journal that allows for identification of the station, recording of observations, and whether it was a physical or chemical change. 
Example data table:
Station # and name
Observations
Physical or chemical change?


Station 1
·         Add a small scoopful of sodium chloride into a half-full 100 mL beaker of water. Stir the contents of the beaker for approximately one minute.
·         Record your observations.
·         Pour the solution down the sink and rinse out the beaker when you are finished.
Station 2
·         Pick up a small piece of magnesium ribbon with the crucible tongs and heat it over the Bunsen burner until you observe a change.
Station 3
·         Pick up a small piece of zinc with crucible tongs and heat it over the Bunsen burner until you observe a change.
·         When you have finished, place the residue into the beaker of water provided.
Station 4
·         Fill a test tube halfway with silver nitrate solution.
·         Quickly squirt an entire pipette full of sodium chloride solution into the test tube.
·         Record observations.
·         When you are finished at this station, pour the contents of the test tube into the waste jar provided, fill the test tube with water (for rinsing) and pour that water into the waste jar.
Station 5
·         Pour 25 mL of acetone into the glass dish.
·         Place a piece of Styrofoam in the acetone.
·         After making observations, remove the Styrofoam with a glass stirring rod. Pour the acetone into the used acetone beaker provided.
Station 6
·         Cut a SMALL fresh slice from the potato.
·         Use a dropper to put 3-4 drops of iodine solution on the potato slice. Record observations.
·         After your observations are complete, throw away the used slice of potato into the trash can.
Station 7
·         Strike a match and watch it as it burns. Blow the match out before it burns your fingers.
·         Dispose in the used matches can.
Station 8
·         Pour about 1 cm of hydrochloric acid into a test tube.
·         Place a small chip of marble in the same test tube.  Make sure the acid covers the chip.
·         Record observations.
·         When you are finished making observations, pour the test tube contents into the waste HCl beaker provided and rinse out the test tube.
Station 9
·         Take full dropper of the acetic acid (vinegar) solution and squirt its contents into a 50 ml beaker.
·         Using the ammonia dropper bottle, add ammonia drop-wise into the 50 ml beaker.
·         When your observations are completed, pour the contents down the drain and clean the beaker with water.

Data Analysis

Answer the following questions in your journal:
1. List all of the chemical changes you observed.
2. List all of the physical changes you observed.
3. What were some of the observations that indicated a physical change had occurred?
4. What were some of the observations that indicated a chemical reaction had occurred?

Conclusion


Write a well-developed conclusion (at least 4 sentences) about what was learned and what types of observations (evidences) can be used to tell whether a physical or chemical change has occurred.


Modifications Teachers Do

This past semester I had an extremely small class of bright but shy students. No matter how much "wait time" I gave or how carefully I phrased discussion questions, dead silence followed. I'm not one to run a monologue so I had to do something. I started handing out 3x5 file cards when I wanted to get some dialogue. Students would write their thoughts down, I'd collect them and leave another for the next question. Then I would share responses and phrase a follow up based on what I read. It is not a perfect system but it got us going through the first half of the semester until the students became comfortable enough with each other to speak out loud.

Critics will say that I did not help them become more independent but I did what I could for pushing thinking about the subject matter (I did force a couple research presentations). Short thoughts I would write on the smartboard so we could organize ideas and expand on them.
I post this in the interest of saying: 
Dear government administrators, teachers naturally modify lessons every day based on individuals, individual classes, class dynamics, and current events. We don't have to write out every modification we do and document it on a form - none of us have time to do that for every situation we modify!- we do it naturally. Teachers are professionals, so please give us that respect.

(Readers please note that I am speaking to all those that would add "accountability" in the form of documentation and not to my personal administration.)